This post first surfaced on Medium on the 26th Aug 2017.
How to filter your data in Rails with PostgreSQL
I started learning Ruby on Rails around the July of 6th this year.
Since then, I’ve met with multitudinous obstacles, one of which was how to filter a data index in Rails. While this may sound simple, the logic work and thinking processes behind it are far from clear. Though there are many ways to do this in Rails (just as there are many roads leading towards Rome), I aim to do it in the simplest (and most elegant) way possible. In fact, I’ve combed many Stack Overflow’s questions and answers, and most, if not, all of them weren’t to my liking.
Anyway, let’s do this.
First, set up a new rails appliation. I assumed you have Ruby and Rails installed on your computer. Otherwise, take a quick look at this guide: http://guides.rubyonrails.org/getting_started.html.
- We’re going to create a new Rails application. Type “rails new jobboard” in your Terminal (I named this project “jobboard” but you can name it anything you like). For the context, I’ll be creating a simple job board that allows for filtering of jobs using the job levels, “Intern”, “Fresh Grad”, “Manager”, etc.
- Go into your directory, “jobboard”, by typing: cd jobboard
- You need a code editor to edit the codes (Duh). I’m using “Visual Studio Code”, but you could use Sublime Text, Atom, or others as well.
- To abstract away from the tedious work in creating a controller, model, view from scratch, I’ll use a special “feature” of Rails to quickly get a CRUD (Create, Read, Update, Delete) application up-and-running. Type “rails generate scaffold Job” and you will see this in the terminal
invoke  active_record
      create    db/migrate/20170826064845_create_jobs.rb
      create    app/models/job.rb
      invoke    test_unit
      create      test/models/job_test.rb
      create      test/fixtures/jobs.yml
      invoke  resource_route
       route    resources :jobs
      invoke  scaffold_controller
      create    app/controllers/jobs_controller.rb
      invoke    erb
      create      app/views/jobs
      create      app/views/jobs/index.html.erb
      create      app/views/jobs/edit.html.erb
      create      app/views/jobs/show.html.erb
      create      app/views/jobs/new.html.erb
      create      app/views/jobs/_form.html.erb
      invoke    test_unit
      create      test/controllers/jobs_controller_test.rb
      invoke    helper
      create      app/helpers/jobs_helper.rb
      invoke      test_unit
      invoke    jbuilder
      create      app/views/jobs/index.json.jbuilder
      create      app/views/jobs/show.json.jbuilder
      create      app/views/jobs/_job.json.jbuilder
      invoke  test_unit
      create    test/system/jobs_test.rb
      invoke  assets
      invoke    coffee
      create      app/assets/javascripts/jobs.coffee
      invoke    scss
      create      app/assets/stylesheets/jobs.scss
      invoke  scss
      create    app/assets/stylesheets/scaffolds.scss
With this, you have a basic working CRUD application. Next, we’ll need to migrate the database to rails. If you don’t, you will get an error like the one below when you start the server and navigate to your localhost.
ActiveRecord::PendingMigrationError
Before we do the migration, we need to make some tweaks to your migration file. In your migration file under “migrate”, which is under “db”, you need to make these codes.
db>migrate
class CreateColumns < ActiveRecord::Migration[5.1]
def change
create_table :jobs do |t|
t.string :name
t.text :level, array: true
end
end
end
I deliberately highlighted the “array:true” because this is the crux of making the filtering action works. I repeat: It’s important to have “array: true” after the column that you wish to filter.
And we are going to use the PostgreSQL, a powerful database management system that allows for systematic storing of your data. Go to your gemfile and type:
gem 'pg'
Run “bundle install” in your terminal. Next go to your database.yml under your config and change “sqlite3” for default’s adapter to “postgresql”.
default: &default
adapter: postgresql
pool: <%= ENV.fetch("RAILS_MAX_THREADS") { 5 } %>
timeout: 5000
Also, change the database to your database name. Since we are in the development environment, changing just the development environment will suffice.
development:
<<: *default
database: postgres
*At this point, you should have a postgresql installed and a database created. If not, please take a look at the postgresql documentation to get started: https://www.postgresql.org/docs/9.6/static/tutorial-start.html.
Once done, type rails db:migrate to create a data table “jobs” in your database with your columns. Double-check your schema to ensure that you have the columns :name and :level reflected there. If these don’t appear, run “rails db:migrate:reset” in your terminal. These columns should appear thereafter.
Type “rails s” to start up your localhost server, and you will see:
This is not what we want to see though. Type this in your URL: http://localhost:3000/jobs to navigate to your jobs index page. And you see this
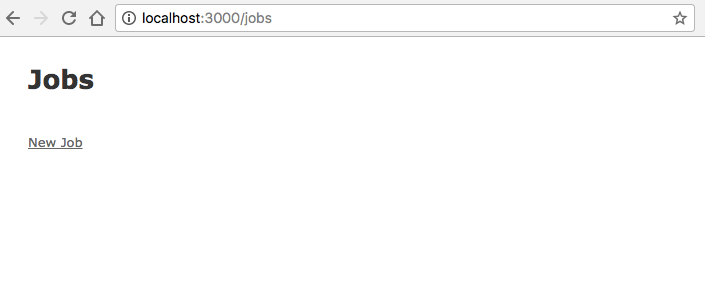
It looks pretty bare now so let’s add some html to the default scaffolding table tag to show the information better, i.e., the jobs’ headings, and their respective name and level, which will be an array. (The rest of the tags have been omitted for brevity)
<tr>
   <th> Name </th>
   <th> Level </th>
</tr>
<% @jobs.each do |job| %>
<tr>
   <td><%= job.name %></td>
   <td><%= job.level %></td>
...
</tr>
<style>
th, td {
border: 1px solid black;
}
</style>
Now, let’s head over to the form partial. When you created a scaffold, Rails very nicely created a form partial at the same time for you. The next thing we need to do is to create the checkboxes for multiple inputs.
*Note: The default form comes with a “form” object builder. I also changed from “form” to “f” to make my codes shorter and to follow the common practice of using “f” for form building in Rails.
_form.html.erb
<%= form_with(model: job, local: true) do |f| %>
...
<%= f.label :name %>
<%= f.text_field :name, class:"form-control"%>
<p>
Job Level
<div class='checkbox'><%= f.check_box(:level, {:multiple => true}, "Intern", nil) %>Intern</div>
<div class='checkbox'><%= f.check_box(:level, {:multiple => true}, "Fresh Grad", nil) %>Fresh Grad</div>
<div class='checkbox'><%= f.check_box(:level, {:multiple => true }, "Junior", nil) %>Junior</div>
<div class='checkbox'><%= f.check_box(:level, {:multiple => true }, "Senior", nil) %>Senior</div>
<div class='checkbox'><%= f.check_box(:level, {:multiple => true}, "Manager", nil) %>Manager</div>
<div class='checkbox'><%= f.check_box(:level, {:multiple => true }, "Director", nil) %>Director</div>
<div class='checkbox'><%= f.check_box(:level, {:multiple => true }, "Co-founder", nil) %>Co-founder</div>
<div class='checkbox'><%= f.check_box(:level, {:multiple => true }, "Others", nil) %>Others</div>
</p>
<style>
.checkbox {
   margin-top: 10px;
}
</style>
Let’s pause for a while to analyse this. I used the check_box form helper with my attribute :level as the first argument, and passed the hash “multiple => true” to tell Rails that there are multiple attributes to be passed to :level in an array form. The “nil” is passed when the checkbox is not checked. I further added some style (margin-top: 10px) to have better spacing between any two checkboxes.
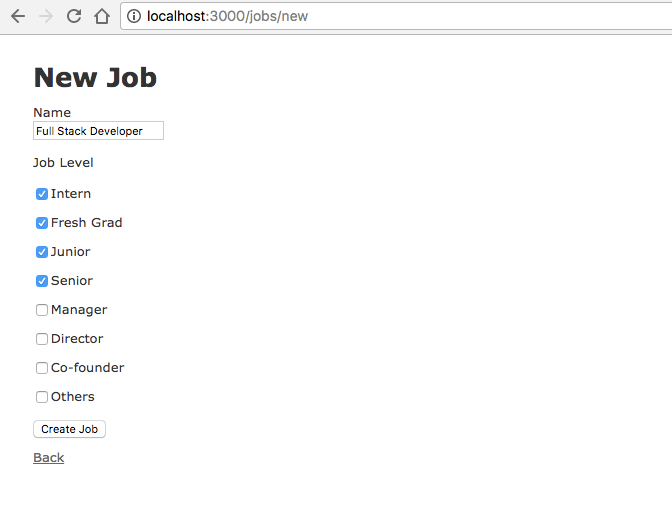
Once done, you’re able to create new jobs by writing the job name and checking on the different job levels needed, i.e., Intern, Fresh Grad, Manager, etc.
Click “Create Job”, and you will see a flash message “Job was successfully created.” Navigate back to the index page by clicking “Back” and you will see your new job created in the table. I took the liberty to further create many other jobs to demostrate the filtering better.
Now, let’s add the filtering link. Head over to your index view and add this above the table tag and below your </h1> tag.
index.html.erb
...
Job Level Filter
<p>
<%= link_to "Intern", jobs_path(:level =>"Intern") %>
<%= link_to "Fresh Grad", jobs_path(:level =>"Fresh Grad") %>
<%= link_to "Junior", jobs_path(:level =>"Junior") %>
<%= link_to "Senior", jobs_path(:level =>"Senior") %>
<%= link_to "Manager", jobs_path(:level =>"Manager") %>
<%= link_to "Director", jobs_path(:level =>"Director") %>
<%= link_to "Co-founder", jobs_path(:level =>"Co-founder") %>
<%= link_to "Others", jobs_path(:level =>"Others") %>
<%= link_to "Clear", jobs_path(@jobs) %>
</p>
<table>
...
What this does is to invoke the “link_to” helper to get the index of jobs (The more technical explanation is pretty technical and I’m probably not well-placed at this moment to elaborate on it. For more information, please refer to http://api.rubyonrails.org/classes/ActionView/Helpers/UrlHelper.html#method-i-link_to).
The first argument is the text that you will see on the web page. The second argument “jobs_path” refers to the index action for your jobs controller. It takes a parenthesis of :level => “Intern” because you want to pass this params[:level] = Intern to the controller to select all jobs which have “Intern” under the “:level” attribute. We’ve also added a ‘Clear” link to clear the filtering by passing the jobs instance to the controller.
At this point, we didn’t concern ourselves with the routing as the scaffolding has already created a nice resource for us. In this case, the default routes of jobs will ensure that jobs_path will link to the index action of the jobs controller.
Now go to your jobs controller and type these codes in the index action:
def index
@jobs = if params[:level].present?
Job.where(' ? = ANY (level)', params[:level])
else
Job.all
end
end
*I would like to attribute this code to my friend, “Aaron Reisman”, who kindly sat with me and showed me the way to solve the entire filtering mechanism. My gratitude goes to him and many other helpful developers who pointed me in the right direction in the journey to create this nice feature.
That’s it! The simple application that has filtering is completed. You can navigate to the index page, ‘/jobs’ and click on “New Job” link to create a new job by typing in your job name and clicking on the different job levels. Thereafter, click on the different job level links to filter.


